Moving can be one of life’s most challenging events, filled with countless tasks and potential pitfalls. Amidst the boxes and furniture, ensuring your essential appliances arrive safely is paramount, and your water dispenser is no exception. As a seasoned technician, I’ve seen firsthand how improper handling can lead to costly damage or shortened appliance life. Moving a water dispenser requires careful preparation, precise steps, and a little patience to prevent leaks, internal damage, and functional issues. This comprehensive guide will walk you through every stage of the process, ensuring your Water Dispenser transitions smoothly to its new home, ready to provide refreshing hydration without a hitch.
Preparing Your Water Dispenser for the Move
The journey to a successful move begins long before you lift your water dispenser. Proper preparation is the foundation of preventing damage and ensuring a hassle-free relocation. Don’t rush this initial phase; it sets the tone for the entire moving process.
First and foremost, safety is paramount. Begin by disconnecting your water dispenser from its power source. Unplug the unit completely to eliminate any risk of electrical shock or accidental activation during handling. If your model features a hot water function, consider dispensing hot water until it runs cool, or let the unit sit for a few hours after unplugging to allow internal heating elements to cool down.
Next, remove the water bottle if you have a top-load or bottom-load dispenser. For bottleless water dispensers that connect directly to a water line, you’ll need to locate and turn off the water supply valve. Detach the water line from the dispenser, ensuring any excess water is collected in a small towel or bucket. Finally, empty and clean the drip tray, as it often collects residual water and can spill during transport.
Draining Your Water Dispenser Completely
One of the most critical steps in moving any water dispenser is ensuring it’s completely drained. Failing to do so can lead to messy leaks, water damage to your property, or even internal corrosion of the appliance itself. This process requires a bit of foresight and the right tools.
Begin by placing a large bucket or several towels around the back and base of your water dispenser. Most dispensers have one or two drain valves—typically located at the lower rear of the unit—for both the hot and cold reservoirs. Carefully open these valves. You’ll likely need a screwdriver or simply be able to turn them by hand. Allow all the water to flow out into your prepared container. To expedite the process and ensure all internal lines are clear, it’s also advisable to press down on both the hot and cold water spigots at the front of the unit until no more water comes out. Remember, hot water can scald, so exercise caution.
Once the reservoirs are empty, you can consider a quick cleaning. Flush the system with a mixture of warm water and a small amount of white vinegar, then drain it again. This helps sanitize the internal tanks and lines, ensuring your dispenser is fresh and ready for use in its new location. After draining, securely close all drain valves and replace any caps.
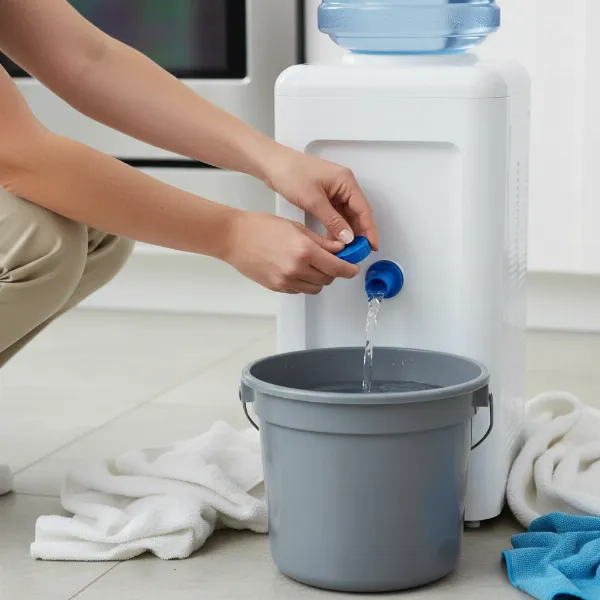 Image showing a person carefully draining a water dispenser into a bucket.
Disassembling and Securing Components
With your water dispenser drained and unplugged, the next step involves preparing its various components for the journey. This meticulous process helps prevent damage to delicate parts and keeps everything organized for reassembly.
Start by removing any easily detachable parts. This typically includes the drip tray, the bottle support collar (for top-load models), and any internal shelves or compartments your dispenser might have. Clean these components thoroughly and pack them separately in a box, preferably with soft packing material like bubble wrap or old towels to prevent scratches or breakage.
The power cord should be neatly coiled and secured with a tie or tape directly to the back of the unit. This prevents it from tangling, snagging, or becoming a tripping hazard during the move. If your water dispenser has a rear access panel or other movable covers, ensure they are securely fastened. For an extra layer of protection, consider wrapping the entire unit in moving blankets, bubble wrap, or heavy-duty stretch film. This safeguards against dings, scratches, and minor impacts during transit, preserving its aesthetic condition.
Transporting Your Water Dispenser: Lifting and Loading
Moving your water dispenser without sustaining damage primarily depends on how you lift and transport it. These units, especially floor-standing models with compressors, can be surprisingly heavy and require careful handling.
Always recruit help when moving a water dispenser. These units are often heavy and awkward, making a solo lift a recipe for injury or damage. Use proper lifting techniques, bending with your knees, not your back, and lifting together. For easier maneuverability, especially over longer distances or into a moving vehicle, a hand truck or appliance dolly is invaluable. Secure the dispenser to the dolly with straps to prevent it from shifting.
The golden rule for transporting water dispensers with refrigeration compressors is to keep them upright as much as possible. This is because the compressor contains lubricating oil that, if the unit is laid on its side or back for an extended period, can flow into the cooling lines. When the dispenser is then plugged in, the compressor may run without proper lubrication, leading to overheating, damage, or even complete failure. While some manufacturers suggest a tilt limit of 45 degrees, maintaining an upright position is always the safest bet. If tilting is unavoidable, keep the duration brief and the angle minimal.
“Treat your water dispenser like a precious cargo; improper tilting or movement can displace vital compressor oil, leading to system failure down the line. Upright is always right.” – Alex Nguyen, Senior Appliance Technician at WaterDispenserPro.com
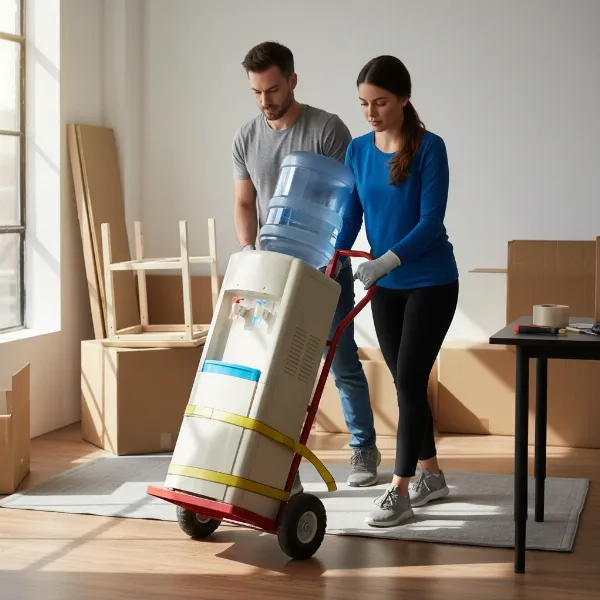 Two people using a hand truck to move a water dispenser, keeping it upright.
Setting Up Your Water Dispenser After the Move
You’ve successfully moved your water dispenser; now comes the final, crucial stage: setting it up in its new environment. This phase includes a vital waiting period that many overlook, but it’s essential for the longevity of your appliance.
Upon arrival, place your water dispenser in its designated spot. Choose a stable, level surface in a well-ventilated area, away from direct sunlight and heat sources like ovens or radiators. Adequate airflow around the unit’s back and sides helps it operate efficiently.
Now for the critical part: the waiting game. If your water dispenser was transported upright throughout the move, allow it to sit undisturbed for at least 2-3 hours before plugging it in. If, however, it was tilted or laid on its side for any length of time (even briefly), you must allow the unit to stand upright for a minimum of 4 hours, with 24 hours being the safest recommendation. This extended waiting period allows the compressor oil, which may have shifted during transport, to settle back into its proper place within the compressor. Plugging it in too soon risks serious mechanical damage.
Once the waiting period is over, reattach any removed components like the drip tray and bottle support. If you have a bottled dispenser, install a new water bottle. For bottleless models, reconnect the water supply line and slowly open the water valve. Before plugging in, dispense water from both the hot and cold taps until water flows steadily, ensuring all air has been purged from the system. Finally, plug in the dispenser, turn on its heating and cooling switches, and allow it to reach its optimal temperatures.
Common Mistakes to Avoid When Moving a Water Dispenser
Even with the best intentions, certain missteps can jeopardize your water dispenser during a move. Being aware of these common pitfalls can save you time, money, and frustration.
- Not Draining Completely: This is perhaps the most frequent mistake. Residual water inside the tanks or lines can spill, leak, or even freeze if exposed to cold temperatures during transit, potentially damaging internal components.
- Laying it Flat or Tilting Excessively: As discussed, compressor-based units are highly susceptible to damage if transported horizontally. The displaced oil can lead to compressor failure, a costly repair.
- Plugging it in Too Soon: Impatience after a move is understandable, but failing to observe the necessary waiting period after transport can directly lead to compressor issues due and void warranties.
- Moving Alone: Water dispensers are heavier than they appear. Attempting to lift and move one solo increases the risk of personal injury and dropping the unit, causing irreparable damage.
- Ignoring Hot Water Safety: Neglecting to let the hot water cool down or draining it carelessly can result in severe burns. Always treat the hot water reservoir with caution.
- Forgetting to Secure Loose Parts: Drip trays, bottle supports, or even power cords left unsecured can become projectiles during transit, damaging the dispenser or other items in the moving vehicle.
By proactively avoiding these mistakes, you significantly increase the chances of a smooth and damage-free move for your water dispenser.
Conclusion
Moving a water dispenser, while seemingly straightforward, requires a methodical approach to ensure its safe arrival and continued performance. From the initial unplugging and thorough draining to the careful transport and the crucial post-move waiting period, each step plays a vital role in preventing damage. Remember the importance of keeping compressor-based units upright and allowing ample time for internal oils to resettle before powering them on. By adhering to these expert guidelines, you can safeguard your investment, avoid costly repairs, and ensure your water dispenser is ready to provide crisp, clean water in your new space.
What aspect of moving appliances do you find most challenging?
Frequently Asked Questions
How long should a water dispenser sit after moving?
|
Our Picks for the Best Water Dispenser in 2026
As an Amazon Associate I earn from qualifying purchases.
|
||
| Num | Product | Action |
|---|---|---|
| 1 | Housiwill Countertop Water Dispenser, Top Loading Water Cooler for 1.2 to 5 Gallon, 3 Temperature Settings Room Temperature Water Cold Hot Water Dispenser, Suitable for Home, Office, Dorm Bedside Use |

|
| 2 | Brio 130 Series Top-Load Water Cooler Dispenser for 3- and 5-Gallon Bottles, Hot & Cold, Spill-Free Loading, Child Safety Lock, Energy Star 3.0, Black |
|
| 3 | Brio Countertop Self Cleaning Bottleless Water Cooler Dispenser with Filtration - Hot Cold and Room Temperature Water. Free Extra Replacement Filters Included - UL/Energy Star Approved |
|
| 4 | Brio Limited Edition Top Loading Water Cooler Dispenser - Hot & Cold Water, Child Safety Lock, Holds 3 or 5 Gallon Bottles - UL/Energy Star Approved |
|
| 5 | Brio Commercial Grade Bottleless Ultra Safe Reverse Osmosis Drinking Water Filter Water Cooler Dispenser-3 Temperature Settings Hot, Cold & Room Water - UL Approved – Point of Use |
|
| 6 | Brio Bottom Loading Water Cooler Dispenser for 5 Gallon Bottles - 3 Temperatures with Hot, Room & Cold Spouts, Child Safety Lock, LED Display with Empty Bottle Alert, Stainless Steel |
|
| 7 | Brita UltraMax Large Water Dispenser With Standard Filter, BPA-Free, Reduces Copper, Cadmium and Mercury Impurities, Lasts 2 Months or 40 Gallons, Includes 1 Filter, Kitchen Accessories, Large 27-Cup |
|
| 8 | Igloo Top Loading Water Cooler with Removable Tray & Energy-Saving Features - Water Tower with Hot, Cold Temperature Settings- Water Dispenser Fits 3 & 5-Gallon Jugs with Child Safety Lock- Stainless |
|
| 9 | Water Jug Pump for 5 Gallon Bottle – Portable Electric USB-C Charging Dispenser, Dual Powerful Motors, Fast Flow, Fits 2-5 Gallon Jugs – Ideal for Home, Office, Camping, RV, Black |
|
| 10 | Primo Bottom-Loading Self-Sanitizing Water Dispenser - 2 Temp (Hot-Cold) Water Cooler Water Dispenser for 5 Gallon Bottle w/Child Safety Lock, Black and Stainless Steel |
|
If transported upright, allow it to sit for 2-3 hours. If it was tilted or laid on its side, it’s crucial to let it stand upright for a minimum of 4 hours, with 24 hours being the safest recommendation to allow compressor oil to resettle.
Can I lay a water dispenser on its side when moving?
It is strongly advised to transport water dispensers upright, especially those with compressors. Laying it on its side can cause the compressor’s lubricating oil to shift into the cooling lines, potentially leading to damage or failure if plugged in too soon.
What happens if you plug in a water dispenser too soon after moving?
Plugging in a water dispenser with a compressor too soon after it has been tilted can cause the compressor to run without proper lubrication. This can lead to overheating, internal damage, or even complete failure of the cooling system.
Do I need to drain my water dispenser before moving it?
Yes, it is absolutely essential to drain all water from your water dispenser before moving it. This prevents leaks during transport, reduces the unit’s weight, and helps avoid potential damage from water sloshing inside.
How do you disconnect a bottleless water dispenser for moving?
First, turn off the main water supply valve to the dispenser. Then, carefully disconnect the water line from the back of the unit, being prepared to catch any residual water with a towel or small container. Ensure all internal tanks are drained afterward.