There’s nothing quite as frustrating as stepping up to your water dispenser, ready for a refreshing drink, only to be met with a stubborn drip or no water at all. Often, the culprit behind such issues is a small yet crucial component: the check valve located within your water probe. With over a decade of experience as an Admin at WaterDispenserPro.com, I’ve seen countless cases of these minor malfunctions, and I’m here to guide you through a straightforward, real-world approach to getting your dispenser back in perfect working order.
Understanding Your Water Dispenser Probe and Its Check Valve
In many modern water dispensers, especially bottom-loading models, a “water probe” is the mechanism that extends into the water bottle to draw water up to the dispensing system. Integral to this probe is a check valve, often a small, one-way valve designed to allow water to flow in only one direction – towards your dispenser’s reservoir – and prevent it from flowing back into the bottle or allowing air to enter the system. This ensures consistent water supply and prevents airlocks.
However, like any hardworking component, these check valves can get stuck. The most common reasons include mineral buildup from hard water, debris or sediment that finds its way into the water supply, or simply mechanical wear and tear on internal parts like springs or seals. In colder environments, freezing within the water lines or the valve itself can also lead to a stuck condition, halting water flow completely.
Symptoms of a Stuck Check Valve
Identifying a stuck check valve typically comes down to observing your dispenser’s behavior. The most obvious symptom is no water dispensing when you press the lever or button, or a significantly reduced flow of water. You might also notice your dispenser’s pump running longer or making unusual noises without actually delivering water, indicating it’s struggling against a blockage. While less common, a faulty check valve might also contribute to minor leaks around the probe or bottle connection if it’s stuck partially open or its seals are compromised.
Safety First: Before You Begin Any Repair
Before attempting any repair, safety is paramount. Always ensure your water dispenser is completely de-energized and depressurized.
- Unplug the Dispenser: Disconnect the power cord from the electrical outlet.
- Shut Off Water Supply: If your dispenser is plumbed directly into a water line, turn off the water supply valve.
- Empty Water Bottle/Reservoir: For bottled dispensers, remove the water bottle. For plumbed units, drain any remaining water from the taps and reservoir to release internal pressure.
Step-by-Step Guide: Fixing a Stuck Check Valve
This guide focuses on typical bottom-loading dispenser probes, but the principles can be adapted for other types of check valves if you can access them.
Step 1: Accessing the Water Probe Assembly
|
Our Picks for the Best Water Dispenser in 2026
As an Amazon Associate I earn from qualifying purchases.
|
||
| Num | Product | Action |
|---|---|---|
| 1 | Brio Countertop Self Cleaning Bottleless Water Cooler Dispenser with Filtration - Hot Cold and Room Temperature Water. Free Extra Replacement Filters Included - UL/Energy Star Approved |

|
| 2 | Brio Limited Edition Top Loading Water Cooler Dispenser - Hot & Cold Water, Child Safety Lock, Holds 3 or 5 Gallon Bottles - UL/Energy Star Approved |
|
| 3 | Brio Bottom Loading Water Cooler Dispenser for 5 Gallon Bottles - 3 Temperatures with Hot, Room & Cold Spouts, Child Safety Lock, LED Display with Empty Bottle Alert, Stainless Steel |
|
| 4 | Housiwill Countertop Water Dispenser, Top Loading Water Cooler for 1.2 to 5 Gallon, 3 Temperature Settings Room Temperature Water Cold Hot Water Dispenser, Suitable for Home, Office, Dorm Bedside Use |
|
| 5 | Igloo Top Loading Water Cooler with Removable Tray & Energy-Saving Features - Water Tower with Hot, Cold Temperature Settings- Water Dispenser Fits 3 & 5-Gallon Jugs with Child Safety Lock- Stainless |
|
| 6 | Brio Commercial Grade Bottleless Ultra Safe Reverse Osmosis Drinking Water Filter Water Cooler Dispenser-3 Temperature Settings Hot, Cold & Room Water - UL Approved – Point of Use |
|
| 7 | Brita UltraMax Large Water Dispenser With Standard Filter, BPA-Free, Reduces Copper, Cadmium and Mercury Impurities, Lasts 2 Months or 40 Gallons, Includes 1 Filter, Kitchen Accessories, Large 27-Cup |
|
| 8 | Brio 130 Series Top-Load Water Cooler Dispenser for 3- and 5-Gallon Bottles, Hot & Cold, Spill-Free Loading, Child Safety Lock, Energy Star 3.0, Black |
|
| 9 | Primo Bottom-Loading Self-Sanitizing Water Dispenser - 2 Temp (Hot-Cold) Water Cooler Water Dispenser for 5 Gallon Bottle w/Child Safety Lock, Black and Stainless Steel |
|
| 10 | Water Jug Pump for 5 Gallon Bottle – Portable Electric USB-C Charging Dispenser, Dual Powerful Motors, Fast Flow, Fits 2-5 Gallon Jugs – Ideal for Home, Office, Camping, RV, Black |
|
First, you’ll need to gain access to the water probe and its check valve. For bottom-loading dispensers, this usually means opening the lower cabinet door and carefully removing the water bottle. The probe is typically a long tube with a cap or fitting at the end that sits inside the water bottle. Gently pull the entire probe assembly out of its housing.
Step 2: Disassembly and Inspection
Once the probe is accessible, carefully examine it. The check valve is often located at the very end of the probe, sometimes integrated into a cap or a small housing. You may need to twist, unscrew, or unclip sections to expose the internal components of the check valve. Look for:
- Visible Debris: Are there any particles, grit, or foreign objects preventing movement?
- Mineral Deposits: Check for white, crusty buildup, especially in hard water areas.
- Corrosion or Wear: Inspect springs, O-rings, and seals for signs of rust, degradation, or cracking.
- Ice Blockages: If the unit has been exposed to cold, check for ice inside the probe or valve components.
> “Often, the simplest solution is overlooked. A thorough visual inspection for physical obstructions can save you hours of troubleshooting.” – Admin, WaterDispenserPro.com
Step 3: Cleaning the Check Valve
With the check valve components exposed, it’s time to clean.
- Gentle Cleaning: Use warm water and a soft brush (like an old toothbrush) to scrub away any loose dirt or debris.
- Descaling for Mineral Buildup: For stubborn mineral deposits, soak the affected parts in a solution of equal parts white vinegar and warm water for 30 minutes to an hour. Vinegar is an excellent natural descaler. Alternatively, a commercial descaling solution approved for food-grade contact can be used, following the manufacturer’s instructions.
- Clearing Obstructions: For persistent blockages, a small, thin object like a toothpick or a straightened paperclip can carefully be used to dislodge particles, but be gentle to avoid damaging delicate components. Rinse all parts thoroughly with clean water after cleaning.
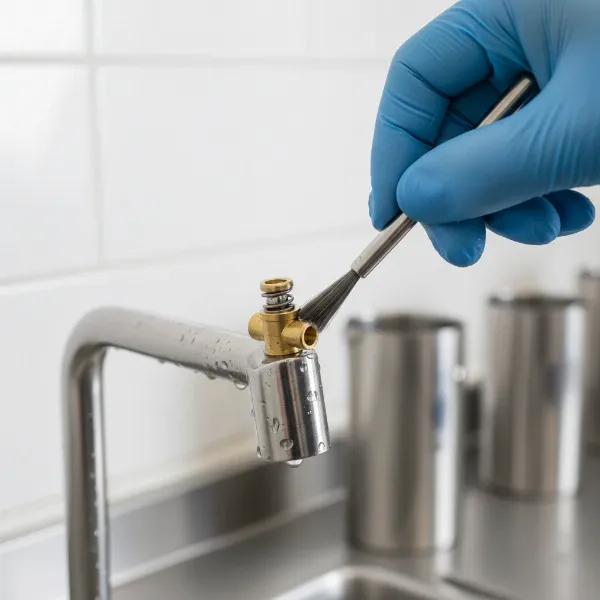 A close-up shot of a technician cleaning a water dispenser probe with a small brush, showing a clear check valve component.
Step 4: Lubrication and Component Replacement (If Necessary)
After cleaning, assess the condition of the moving parts.
- Lubrication: If components feel stiff or show signs of friction, a food-grade silicone lubricant (approved for water contact) can be applied sparingly to O-rings and moving parts to restore smooth operation.
- Component Replacement: If any O-rings, seals, or springs appear visibly damaged, stretched, or corroded, they should be replaced. Many manufacturers offer repair kits or individual parts for their probe assemblies. Ensure you use exact replacements to guarantee proper fit and function.
Step 5: Reassembly and Testing
Once cleaned and any necessary replacements are made, carefully reassemble the check valve and the entire water probe assembly.
- Secure All Connections: Ensure all parts are securely fastened, and any O-rings or seals are correctly seated to prevent leaks.
- Reinstall the Probe: Place the water probe back into the dispenser, ensuring it’s correctly positioned in the water bottle.
- Restore Power and Water: Plug the dispenser back in and, if applicable, turn the main water supply back on.
- Test for Leaks and Functionality: Dispense water several times to prime the system and check for proper flow. Carefully inspect all connections for any leaks. If the water flow is restored and there are no leaks, you’ve successfully fixed your stuck check valve!
When to Consider Professional Help or Replacement
While many check valve issues are DIY-friendly, there are times when professional intervention or a full replacement is the better option. If, after following these steps, your dispenser still isn’t working, or if you discover extensive damage to the probe assembly or the main check valve body, it might be time to call a qualified technician or consider replacing the entire water probe or even the dispenser. Older units with frequent issues might also benefit from a complete upgrade.
Preventive Maintenance Tips to Avoid Future Issues
Preventing a stuck check valve is easier than fixing one.
- Regular Cleaning Schedule: Make it a habit to clean your water dispenser and its probe assembly every few months, especially if you have hard water.
- Use Filtered Water: If your dispenser uses bottled water, consider using filtered water to reduce mineral buildup. For plumbed-in units, ensure your filtration system is regularly maintained.
- Monitor Water Quality: Be aware of the water quality in your area. If you notice high mineral content, increase your cleaning frequency.
- Proper Installation: Always ensure water bottles are installed correctly and that the probe is not forced or bent, which could damage the valve.
- Protect from Freezing: In colder climates, ensure your dispenser is not exposed to temperatures that could cause water lines or reservoirs to freeze.
Conclusion
A stuck check valve in your water dispenser’s probe can be a nuisance, but it’s often a repairable issue with a bit of patience and the right steps. By understanding the causes, recognizing the symptoms, and following a methodical cleaning and inspection process, you can restore your dispenser’s functionality and enjoy uninterrupted access to fresh, clean water. Regular maintenance is key to prolonging the life of your appliance and preventing future headaches. So, the next time your water dispenser acts up, will you be ready to tackle the challenge?
Frequently Asked Questions
How often should I clean my water dispenser probe?
For optimal performance and to prevent mineral buildup, it’s recommended to clean your water dispenser probe and internal components every 3 to 6 months, particularly in areas with hard water. Regular cleaning helps ensure smooth operation and hygienic water delivery.
Can I use any descaling solution?
No, it’s important to use either a mild solution of white vinegar and water or a commercial descaling agent specifically approved for use in food-contact appliances. Avoid harsh chemical cleaners that could leave residues or damage plastic and rubber components.
What causes a water dispenser to stop pumping water?
Beyond a stuck check valve, common reasons for a water dispenser to stop pumping include an empty water bottle, an airlock in the system, a clogged water filter, a malfunctioning water pump, or a frozen reservoir or water line. Troubleshooting often starts with the simplest causes first.
Is it hard to replace a check valve in a water dispenser?
Replacing a check valve itself can range from easy to moderately difficult, depending on your dispenser’s model and the valve’s accessibility. Some check valves are easily removable components, while others may be integrated into larger assemblies requiring more careful disassembly. Consulting your dispenser’s manual is always a good first step.