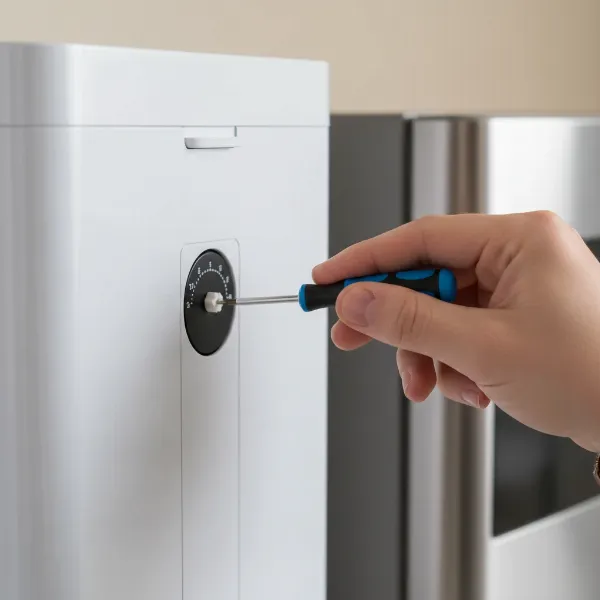
Imagine a refreshing glass of water, instantly available at the perfect temperature. That’s the convenience a water dispenser brings to countless homes and offices, making daily hydration effortless. However, this silent workhorse, while a beacon of convenience, requires consistent attention to truly thrive. Without a regular maintenance regimen, your beloved water dispenser can become a breeding ground for bacteria, impact the taste of your water, and even shorten its lifespan. This comprehensive guide provides you with an actionable maintenance checklist, meticulously designed to ensure your water dispenser remains a source of clean, safe, and delicious water for years to come.
The Indispensable Benefits of Regular Water Dispenser Maintenance
Why invest time in cleaning and maintaining your water dispenser? The reasons extend far beyond just aesthetics. Regular maintenance is the bedrock of ensuring optimal performance, safeguarding your health, and protecting your investment. Firstly, it’s crucial for hygiene. Water is a prime environment for microbial growth, and neglecting your dispenser allows biofilms, algae, and bacteria to flourish, potentially compromising your drinking water quality. Secondly, consistent care preserves water taste and purity. A dirty dispenser can impart off-flavors or odors, turning a refreshing sip into an unpleasant experience. Thirdly, proper maintenance enhances efficiency and extends appliance life. Accumulated mineral deposits or clogged lines force the dispenser to work harder, leading to increased energy consumption and premature wear and tear on components. Ultimately, a well-maintained water dispenser means fewer repairs, consistent performance, and the peace of mind that comes from knowing your water is truly clean.
Understanding Your Water Dispenser Type: Tailoring Your Maintenance
Water dispensers come in various forms, each with unique characteristics that subtly influence their maintenance needs. Primarily, they fall into two broad categories: bottled water dispensers and point-of-use (POU) or plumbed-in dispensers. Bottled dispensers, whether top-loading or bottom-loading, rely on large external water bottles. Their maintenance focuses heavily on sanitizing the water reservoir, bottle probe, and dispensing spigots, as these are the primary contact points for the water.
Point-of-use dispensers, on the other hand, connect directly to your home’s water line and often feature an integrated filtration system. For these models, maintaining the filtration system—specifically, timely filter replacement—is paramount, in addition to cleaning the external parts and internal water lines. Understanding which type of dispenser you own is the first step in applying the right maintenance tasks effectively.
Comparative Maintenance Glance: Bottled vs. Point-of-Use Dispensers
While both types of water dispensers benefit from routine cleaning, specific tasks and frequencies can differ. The table below highlights key maintenance aspects, helping you to understand where your focus should be based on your dispenser type.
| Maintenance Task | Bottled (Top-load/Bottom-load) | Point-of-Use (POU) |
|---|---|---|
| Exterior Wipe Down | Daily/Weekly | Daily/Weekly |
| Drip Tray Clean | Daily/Weekly | Daily/Weekly |
| Spigot/Faucet Clean | Weekly/Monthly | Weekly/Monthly |
| Reservoir Sanitize | Quarterly/Bi-annually | Not applicable |
| Waterline Flush | Not applicable | Quarterly/Bi-annually |
| Filter Replacement | Not applicable | Every 3-6 months |
| Leak/Wear Inspection | Bi-annually | Bi-annually |
This comparison underscores the importance of a tailored approach. Bottled dispensers require meticulous internal reservoir cleaning, while POU units demand vigilant filter management and waterline maintenance to ensure continuously purified water.
Crafting Your Personalized Water Dispenser Maintenance Routine
Developing a consistent maintenance routine is key to maximizing your water dispenser’s lifespan and ensuring the highest water quality. Think of it as creating a health plan for your appliance. Start by consulting your dispenser’s user manual; it often contains model-specific cleaning instructions and recommended frequencies. Next, consider your usage patterns. A dispenser in a busy office will likely require more frequent cleaning than one in a single-person household. Assess your local water quality; hard water areas might necessitate more frequent descaling. Once these factors are considered, you can adapt the following checklist to form a schedule that perfectly fits your specific needs. Consistency, not just intensity, is what will truly make a difference in your dispenser’s longevity and performance.
Your Comprehensive Water Dispenser Maintenance Checklist for Longevity
Implementing a structured cleaning and inspection regimen is the most effective way to keep your water dispenser in top condition. This checklist breaks down essential tasks into manageable frequencies, ensuring thorough care for every component of your unit.
Daily & Weekly Maintenance: Keeping Things Tidy
These quick, routine tasks prevent grime from building up and ensure immediate hygiene.
- Wipe Down Exterior Surfaces: Use a clean, damp cloth to wipe down the outside of your dispenser, including the body and control panel. This removes dust, fingerprints, and minor spills, keeping it looking clean and inviting.
- Empty and Clean the Drip Tray: The drip tray catches accidental drips and spills. Remove it, empty any collected water, wash it with warm soapy water, rinse thoroughly, and dry before returning it to its place. This prevents mold and mildew growth.
- Sanitize Spigots and Faucets: These are high-touch areas. Use a sanitizing wipe or a cloth dampened with a food-grade sanitizer (or a mild vinegar solution) to clean around the dispense nozzles and levers. Pay attention to any crevices where germs might hide.
|
Our Picks for the Best Water Dispenser in 2026
As an Amazon Associate I earn from qualifying purchases.
|
||
| Num | Product | Action |
|---|---|---|
| 1 | Brio Bottom Loading Water Cooler Dispenser for 5 Gallon Bottles - 3 Temperatures with Hot, Room & Cold Spouts, Child Safety Lock, LED Display with Empty Bottle Alert, Stainless Steel |

|
| 2 | Water Jug Pump for 5 Gallon Bottle – Portable Electric USB-C Charging Dispenser, Dual Powerful Motors, Fast Flow, Fits 2-5 Gallon Jugs – Ideal for Home, Office, Camping, RV, Black |
|
| 3 | Igloo Top Loading Water Cooler with Removable Tray & Energy-Saving Features - Water Tower with Hot, Cold Temperature Settings- Water Dispenser Fits 3 & 5-Gallon Jugs with Child Safety Lock- Stainless |
|
| 4 | Brio Commercial Grade Bottleless Ultra Safe Reverse Osmosis Drinking Water Filter Water Cooler Dispenser-3 Temperature Settings Hot, Cold & Room Water - UL Approved – Point of Use |
|
| 5 | Primo Bottom-Loading Self-Sanitizing Water Dispenser - 2 Temp (Hot-Cold) Water Cooler Water Dispenser for 5 Gallon Bottle w/Child Safety Lock, Black and Stainless Steel |
|
| 6 | Brio 130 Series Top-Load Water Cooler Dispenser for 3- and 5-Gallon Bottles, Hot & Cold, Spill-Free Loading, Child Safety Lock, Energy Star 3.0, Black |
|
| 7 | Housiwill Countertop Water Dispenser, Top Loading Water Cooler for 1.2 to 5 Gallon, 3 Temperature Settings Room Temperature Water Cold Hot Water Dispenser, Suitable for Home, Office, Dorm Bedside Use |
|
| 8 | Brita UltraMax Large Water Dispenser With Standard Filter, BPA-Free, Reduces Copper, Cadmium and Mercury Impurities, Lasts 2 Months or 40 Gallons, Includes 1 Filter, Kitchen Accessories, Large 27-Cup |
|
| 9 | Brio Limited Edition Top Loading Water Cooler Dispenser - Hot & Cold Water, Child Safety Lock, Holds 3 or 5 Gallon Bottles - UL/Energy Star Approved |
|
| 10 | Brio Countertop Self Cleaning Bottleless Water Cooler Dispenser with Filtration - Hot Cold and Room Temperature Water. Free Extra Replacement Filters Included - UL/Energy Star Approved |
|
Monthly & Quarterly Deep Cleaning: For Pristine Water Quality
Deeper cleaning addresses internal components and prevents mineral buildup and bacterial growth that can affect water quality.
- Unplug and Drain the Dispenser: Safety first! Always unplug your unit from the power outlet before starting any deep cleaning. Drain all remaining water from both the hot and cold reservoirs through the respective spigots and the drain plug at the back or bottom.
- Thorough Reservoir/Tank Cleaning:
- For Bottled Dispensers: Remove the water bottle. Create a sanitizing solution using either one cup of white vinegar mixed with three cups of water, or one teaspoon of unscented household bleach mixed with one gallon of water. Pour the solution into the cold water reservoir. Let it sit for 15-30 minutes.
- For POU Dispensers: If your manual recommends it, you may be able to flush the internal lines with a similar solution. Follow manufacturer guidelines precisely.
- Rinse Thoroughly: After allowing the sanitizing solution to work, drain it completely. Then, fill the reservoir with fresh, clean water and drain it again. Repeat this rinsing process at least 2-3 times to ensure all traces of the cleaning solution are removed. This is crucial for avoiding any lingering taste or odor.
- Clean External Components: While the unit is drained, take the opportunity to clean other accessible external parts, such as the bottle support collar (for top-load units) or the cabinet interior (for bottom-load units) with a mild soap and water solution.
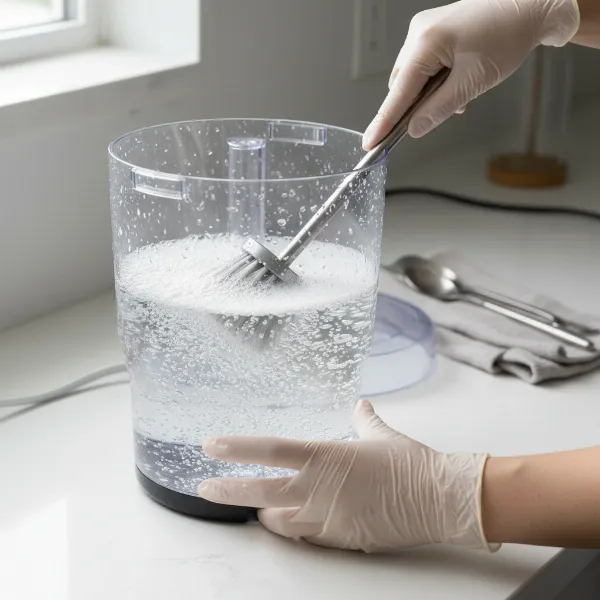 A person carefully cleaning the internal reservoir of a water dispenser with a white vinegar solution, focusing on hygiene and longevity, bright kitchen setting
Bi-Annual & Annual Checks: Ensuring Peak Performance
These less frequent but critical tasks address the long-term health and efficiency of your dispenser.
- Full System Sanitization: Conduct a thorough sanitization as described in the monthly/quarterly steps, but consider extending the soaking time slightly (if the manual allows) or ensuring every accessible nook and cranny is addressed. This is particularly important for areas prone to mold or mineral buildup.
- Inspect for Leaks and Wear: Visually inspect all hoses, connections, and seals for any signs of wear, cracks, or minor leaks. Early detection can prevent significant water damage and costly repairs. Check the power cord for fraying or damage.
- Replace Air Filters (if applicable): Some advanced water dispensers, especially POU models, may have small air filters to prevent dust from entering the system. Consult your manual for their location and replacement schedule.
- Water Filter Replacement (for POU models): For plumbed-in units, replacing the water filter according to the manufacturer’s recommendation (typically every 3-6 months, or after a certain volume of water) is non-negotiable. A clogged filter compromises water quality and reduces flow rate.
Maximizing Longevity: Essential Usage and Care Tips for Your Dispenser
Beyond the cleaning checklist, certain usage habits can significantly contribute to your water dispenser’s extended life.
- Proper Placement: Always place your water dispenser on a level, sturdy surface, away from direct sunlight, heat sources (like ovens or radiators), and excessive humidity. Extreme temperatures can affect its cooling and heating efficiency and potentially damage components.
- Never Run Empty: For bottled dispensers, avoid letting the water bottle run completely dry, especially if the hot water function is in use. Running the heating element without water can cause damage. Replace bottles promptly.
- Handle Bottles with Care: When changing water bottles, ensure they are clean and free of debris around the neck. Avoid rough handling that could introduce contaminants into the dispenser.
- Regular Inspections: Make it a habit to quickly glance at your dispenser for any unusual noises, odors, or visible issues like minor leaks. Addressing small problems early can prevent them from escalating into major repairs.
- Follow Manufacturer’s Manual: This cannot be stressed enough. Your specific model may have unique features or requirements. Adhering to the manufacturer’s instructions is the best way to ensure optimal performance and warranty validity.
> “A well-maintained water dispenser isn’t just about clean water; it’s about investing in the longevity of your appliance and, by extension, the health of your family or employees. Simple, consistent steps make all the difference.” – Admin, WaterDispenserPro.com
Conclusion
Your water dispenser is a valuable asset, providing convenient access to clean, temperature-controlled water. By diligently following this comprehensive maintenance checklist, you’re not just performing routine chores; you’re actively ensuring the health and efficiency of your appliance for years to come. From daily wipe-downs to bi-annual deep sanitization and filter replacements, each step plays a vital role in preventing bacterial growth, preserving water quality, and extending its operational lifespan. Embrace these practices, and your water dispenser will continue to serve you reliably, offering pure refreshment whenever you need it. What steps will you add to your water dispenser maintenance routine starting today?
Frequently Asked Questions
How often should I clean my water dispenser?
Daily or weekly for exterior and drip tray, monthly or quarterly for a deep clean and sanitization of the reservoir, and bi-annually or annually for a full system check and filter replacement (for POU models). High usage or hard water areas may require more frequent cleaning.
Can I use bleach to clean my water dispenser?
Yes, you can use a diluted bleach solution (one teaspoon of unscented household bleach per gallon of water) for sanitization. However, it is crucial to rinse the dispenser thoroughly multiple times with fresh water afterward to remove all bleach residue and prevent any lingering taste or odor. Always consult your manual.
What happens if I don’t clean my water dispenser?
Neglecting your water dispenser can lead to several problems: bacterial and mold growth, off-tasting or foul-smelling water, reduced water flow, increased energy consumption, and premature wear and tear on internal components. This can ultimately shorten the life of your appliance.
How do I clean the inside of a bottom-load water dispenser?
Cleaning a bottom-load dispenser’s internal reservoir often involves similar steps to top-load units, but accessing the reservoir may differ. Typically, you’ll still use a diluted cleaning solution (vinegar or bleach), but pouring and draining might be facilitated through specific access points or by removing a hose, as outlined in your dispenser’s user manual.